Hi! I’m Beth, a SAHM (stay at home mom) who enjoys cooking dinner, but not when my toddler is whining to be held, my preschooler is crying over a boo boo and my 6 year old is telling me a stuffed animal is taking an impromptu merry-go-round ride on his ceiling fan. To remedy this situation, I load my freezer with dinner meals. So now I have time to cuddle my toddler, comfort my preschooler and rescue the poor dizzy dinosaur at 4:30 p.m. every weekday in our home.
It all began 2 years ago, when we were given a small upright freezer and I knew I had to fill it if it was going to be plugged in and running. I had to justify that extra electricity somehow! I didn’t want it just sitting with a loaf of bread and wadded up newspapers, so I googled freezer meals. I checked out library books titled, Frozen Assets and Don’t Panic Dinner’s in the Freezer. I read about these CrAzY people that cook one day for an entire month. I loved what I read but didn’t know if I was that CrAzY.
At that time, I decided I wasn’t CrAzY so I played it safe. I picked out one recipe and made it. I packaged it into portions for our dinner meals and froze it. My husband & I were pleasantly surprised at the taste – when stored, thawed & reheated properly, the food tastes like it was prepped that afternoon! That one recipe success encouraged me to try more recipes. Often I would make a casserole in 2 8×8 pans then bake one that night for dinner and package the other one for the freezer and use as a meal a few weeks later.
At the beginning of 2009, when I was 3 months away from my 3rd child’s birth, I certified myself completely CrAzY and decided to make my New Year’s resolution to cook once a month for every month of the year. You know most resolutions don’t get to the beginning of February, but I am proud to say I did it 10 of the 12 months that year. Besides my time savings each night of the month, I found the savings in our food budget was amazing. I could make around 34 dinners for approximately $150. That made each dinner cost around $4.41, not per person, but per MEAL!
Why did I just share all of that with you? Well, so you could see I am CrAzY freezer-meal-making SAHM but for good reasons. Cooking meals ahead of time and storing them in the freezer…saves TIME, saves MONEY & saves my SANITY! Some days saving my sanity is all that matters!
So are you ready to try a recipe? If you’ve never dabbled in freezer meals before, now is the perfect time to start. Try just one this next week. In fact, make it for your dinner (double it if your family is bigger than mine) so you have dinner for that evening plus one to store in the freezer.
Here are a few of our favorite recipes for breakfast, lunch, dinner…
BREAKFAST:
French Toast Casserole
This recipe is one of the simplest to prep for the freezer and works for breakfast, brunch or dinner! This recipe will make 1 9×13 pan or 2 8×8 pans – our family is small so I make 2 8x8s. If you are a larger family, double the recipe and make 2 9×13 pans.

1 loaf of French or Italian bread
1 stick of unsalted butter, melted
1 c. brown sugar (Sucanat works well, too!)
1 tsp. cinnamon
6 eggs
1 ¼ c. milk
1 tsp. vanilla
Cube the loaf of bread (1”x1” cubes are a good size).
Stir melted butter, sugar & cinnamon together. Spread on bottom of pan(s). Throw bread on top. Mix together eggs, milk & vanilla. Pour over bread. Divide carefully if using 2 pans! J
Cover with plastic wrap and then a layer of foil. Label & freeze. To serve: Thaw 24 hours in fridge. Bake uncovered for 30 minutes at 350F or until eggs are set & bread is lightly browned. The aroma is delicious!!!!
Homemade Granola
This is my favorite granola recipe because you can mix & match various nuts & dry fruits. It’s so easy for busy mornings – take it right from the freezer and put it in your bowl with milk! Original recipe from 30 Day Gourmet. One recipe makes 12 cups of granola.
2 c. whole wheat flour
6 c. rolled oats
1 c. unsweetened coconut
1 c. wheat germ
2 tsp. salt
2 T. sesame seeds
½ c. nuts
½ c. water
1 c. oil
1 c. honey
2 tsp. vanilla
1 c. dried fruit – reserve until after granola is baked & cooled
In a very large bowl, combine the dry ingredients (except the dried fruit). In a smaller bowl, combine wet ingredients. Add wet ingredients to the dry ingredients and stir until well-combined. Spread mixture evenly on 2 large baking sheets (2 jelly roll pans are perfect!). Bake at 250F for 1 hour, stirring every 20 minutes. Cool, then add dried fruit and store in Ziploc bags in the freezer.
To Serve: Pour granola into bowl – eat dry or add milk!

LUNCH
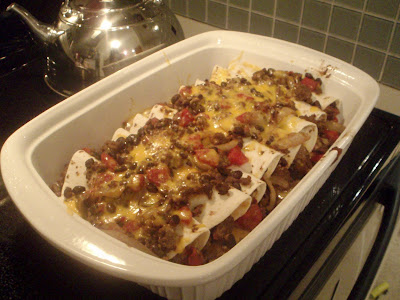
Black Bean Soup
This recipe is the easiest soup you’ll prep for the freezer! Goes well with quesadillas – place a few tortillas & bag of cheddar cheese in a Ziploc!
 2 16 oz. cans black beans, rinsed & drained
1 ½ c. vegetable broth (can swap with chicken broth)
1 c. chunky medium salsa
1 tsp. ground cumin
Combine ingredients in blender and blend to your desired consistency. You will have 4 cups of soup. Pour 2 cups into 2 quart bags or all 4 cups into 1 gallon size Ziploc Freezer bag. Remove as much air as possible before sealing. Lay bag(s) flat in freezer to freeze.
To Serve: Thaw overnight in fridge. Pour soup into saucepan and heat on stovetop. Top with cheddar cheese, avocado, sour cream or other desired toppings.
Deli-Style Sandwiches
Easy to assemble! I’ve made this recipe without the sauce for easy lunches or dinners to go, adding fresh lettuce, tomatoes and other condiments just prior to eating! Great for the summer & spontaneous family picnics at the park!
12 hoagie rolls
2 lbs. deli meat (roast beef or turkey)
1 lb. cheese (provolone or muenster works well)
Sauce:
3 T. butter, melted
3 T. Dijon mustard
3 T. Worcestershire sauce
3 tsp. minced onion
Assemble sandwiches together by layering cheese and meat on the bottom half of the bread. Top with the sauce. Wrap each sandwich in foil and place in gallon-size Ziploc Freezer bag if you are going to be eating them individually. If packaging for a meal for a family, place sandwiches directly in Ziploc & seal.
To Serve: No need to thaw. Remove from Ziploc bag (leave foil on sandwich) and bake at 350F for 30-40 minutes. Or place several unwrapped sandwiches in a baking dish, cover with foil and bake.
To Serve sandwiches without sauce: Thaw a few hours in the fridge or pack in cooler for a picnic. Top with desired veggies & condiments.

DINNER
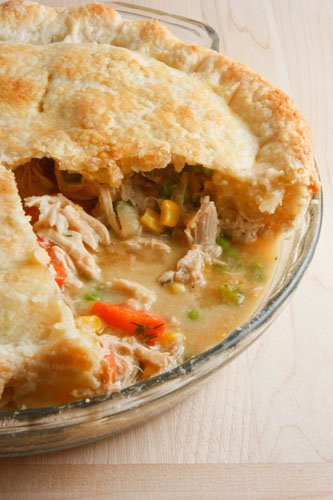
Lasagna
The easiest lasagna to put together as the noodles require no cooking! I’ve made it numerous time. You can add thawed chopped (and drained) spinach to the cottage cheese, or browned ground beef or turkey. One recipe makes 1 9×13 pan (12 servings) or 2 8×8 pans (6 servings each).
12 oz. lasagna noodles, uncooked
5-6 cups spaghetti sauce (jar or make your own)
2 c. cream-style cottage cheese or ricotta
12 oz. mozzarella cheese, sliced or grated
½ c. grated Parmesan cheese
Make layers in 1 9×13 pan or 2 8×8 pans: half each noodles, cottage cheese, mozzarella cheese, spaghetti sauce & sprinkled parmesan. Repeat. Be sure dry noodles are covered completely with sauce.
Wrap pans in 1 layer of plastic wrap and 1 layer of foil. Label &freeze.
To Serve: Thaw completely in fridge (24+ hours, especially if it is a 9×13 pan). Cover casserole with foil (remove plastic wrap) and bake in 350F oven for 45 minutes or until edges are bubbly and center is hot. Remove foil and bake 10 more minutes. Let stand 15 minutes before cutting and serving.

Garlic Bread
You can’t have an Italian dish without garlic bread. My kids devour this so be sure to bake plenty with your meal! It’s from 30 Day Gourmet’s website.
2 sticks unsalted butter (or margarine)
½ c. olive oil
¼ c. garlic powder
¼ c. Italian seasoning
1 c. parmesan cheese, optional
2 loaves Italian bread sliced 1” thick
In medium bowl, mix together the butter, oil, garlic powder, Italian seasoning and parmesan cheese, if desired. The consistency of the mixture should be something you can spread easily. If it’s too thick, add more olive oil. Spread both sides of each slice of bread and place on a cookie sheet or cutting board to freeze. Once slices are completely frozen, remove from baking sheet and place in gallon-size Ziploc bags.
To Serve: No thawing needed. Remove desired number of frozen slices directly from Ziploc bag and place on baking sheet. Bake at 400F for 8-10 minutes turning slices over halfway through baking time.

Easy How To:
Now that you’ve had a chance to look at a few recipes, you’re ready to try one, right?! Here are a few more basic tips about freezing meals…
Freezing: Invest in the Ziploc Freezer bags in both the gallon & quart size. If you remove most of the air and seal the bag completely your food will taste great! Bags are great for soups, noodle dishes, rice dishes, sandwiches, garlic bread & more! For storing casseroles in glass or foil pans, wrap with 1 layer of plastic wrap and 1 layer of foil.
Labeling: Label & date everything you store. Sharpie markers work well on the freezer bags and the foil covering a frozen casserole. I not only include the name of the meal, but also if it requires thawing by writing “thaw” or “no thaw” and the temperature at which it bakes in the oven. That way I’m not hunting down the recipe the night I plan to serve that meal for dinner.
Thawing: Always thaw foods in the fridge to prevent problems with the ingredients getting too warm prior to baking or reheating. Some recipes are able to be reheated directly from the frozen state, but most are meant to be thawed at least 24 hours in the fridge prior to reheating.
Reheating: I’ve found the best-tasting food is reheated on the stovetop (sauces) or in the oven (casseroles & sandwiches), not the microwave (with the exception of burritos).
So are you CrAzY enough to try making a freezer meal?! You are, I know you are! Enjoy your extra time & savings you’ll have with dinners in your freezer!
For more recipes that are great-tasting & easy to prepare for families, feel free to visit my blog: http://easierwiththefreezer.blogspot.com/